
za'atar manoushé
Iconic street food in Lebanon, you’re unlikely to visit the country without eating a za’atar manoushé. If you go past a bakery as doughy discs on wooden trays are shovelled into a gas fired oven, it’s hard to walk on without stopping. The aroma of the flat bread painted with za’atar mix and extra virgin olive oil is unforgettable. As is the taste. Since they’re hard to come by where we live, we’ve learnt how to make our own za’atar manoushé. And if we can do it, anyone can!
Just as pizza making is straightforward, so is a making a manoushé. Practice helps, and it’s a good weekend activity. With some extra virgin olive oil for a bit of elasticity, we like to roll the dough thin so that it cooks quickly in the oven. The oven has to be hot to crisp up the flat bread, so keep an eye on the colour of the topping and catch it before it goes too dark. We’ve missed it on numerous occasions!
Manoushé, منقوشة, means painted, coloured or dappled in Arabic. Once you’ve rolled the pastry out, firmly stipple the dough with your fingers. This will help prevent the dough from inflating (and losing the delicious mixture) once in the oven. Then comes the painting bit. One of those silicon pastry brushes is ideal for this, as you can wash it easily afterwards, but the back of a spoon (Michelangelo would have approved!) will do too. With a bowl of za’atar mix blended with extra virgin olive oil to hand, paint the dough, not too close to the edge to minimise the inevitable leakage in the oven.
makes 8 flatbreads
ingredients for the dough mixture
1 tsp (5g) fast action yeast
420g strong bread flour
300ml water
2 tsp salt
2 tsp sugar
25ml Zejd extra virgin olive oil
for the topping
60g of za’atar mix
120ml Zejd extra virgin olive oil
method
- Dissolve the yeast in the water with the sugar and set aside for 1o minutes to become frothy.
- Sift the flour and the salt into the mixing bowl of a freestanding mixer for which you have a dough hook.
- Add the extra virgin olive oil to the yeast mixture and stir. With the machine on slow, gradually pour this into the flour mixture. If you feel that it is too dry add a tablespoon of warm water to help the mixture come together.
- Once formed, raise the speed to medium and work for 5 minutes. The dough is ready when you press your finger into it and it springs back and is no longer sticky.
- Grease a bowl lightly with some olive oil, and place the dough in the centre. Cover with a tea towel and leave to rise for 1 and half hours until double the size.
- Then remove the dough, and form into a log. Divide into 8 equal sized pieces and shape each one into a ball.
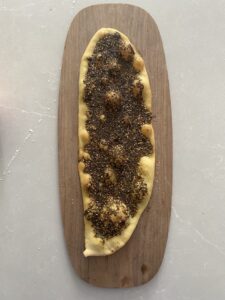
- Using a rolling pin, roll each ball into a flat circle – roughly 20cm in diameter. (Or you can roll them into long shapes as in the photo). Cover again with a tea towel and leave for 10 minutes.
- Turn the oven on to Gas 430F/220C and place a baking tray in it.
- Stir the za’atar mix with the extra virgin olive oil – it should be runny.
- After 10 minutes, stipple the dough with your fingers (to stop it rising in the oven). If you have a silicon brush, you can paint the mixture onto the dough. If not, take a tablespoon of the mixture, and using the back of the spoon, sweep it around to “paint” the dough, leaving 1 cm of dough around the edge.
- Using a floured wooden board, move the circle onto the board and quickly open the oven door and shove the bread onto the hot baking tray.
- Leave for 3-5 minutes – keep an eye so the mixture doesn’t burn. When the edges are coloured, remove. Leave to cool a little.
Serve alongside some mint, slices of cucumber, tomatoes and a bowl of Zejd souri green cracked olives or black olives.